
Work in progress, last updated 2024-08-15.
In time I intend to flesh this out with more HOWTOs and guides, but for now I’ll just give a broad overview of each option and some links that may potentially be useful.
By the way: if you’re here for a recommendation for a current, up to date, performant and genuinely useful operating system to run on your first gen Intel Mac that’s easy to install and will make your system useful again - and you can’t be bothered with reading all of this info (fair), my personal recommendation would be Linux - specifically the Debian net installer as explained in that section.
Quick Navigation
- Introduction & Hardware Upgrades
- The Legacy BIOS / 32-Bit EFI Problem
- How To Boot An Intel Mac From USB And / Or DVD / CD
- Mac OS
- Windows (Legacy) - XP / Vista / 7 / 8 / 8.1
- Windows (Current) - 10 / 11
- Linux
- Other Options..?
Introduction & Hardware Upgrades
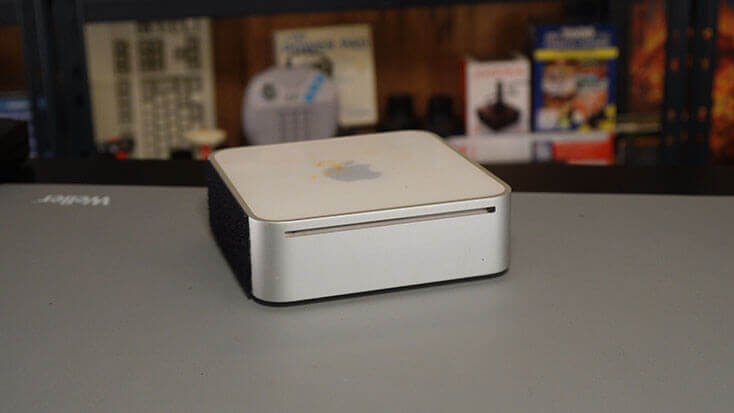
I recently found myself reviving my old 2006 Intel Mac Mini with 1.83GHz Core Duo CPU and 2GB of RAM (MacMini 1,1). For maximum performance, I installed the modified 2,1 firmware and upgraded the RAM to 4GB, which is double what was originally officially supported by Apple. The 2006 Intel Mac Mini 1,1 takes 2x 667MHz DDR2 PC2-5300 SODIMMs and they can be picked up inexpensively on eBay.
I also upgraded the CPU to a 2.33GHz Core 2 Duo T7600 - the fastest that this motherboard supports. These two upgrades resulted in a 30% performance improvement, and so I can highly recommend them if you’re looking to get the most out of these old machines. Also with the original Core Duo you will be limited to 32-bit operating systems only, and 32-bit support is rapidly disappearing.
Note that the information on this page is written with the above upgraded Intel “polycarbonate” Mac Mini 1,1 in mind as that’s what I am using for testing, but will also apply to other first-gen 64-bit Intel Macs with 32-bit EFI, for example:
- Upgraded Mac Mini 1,1 with modified firmware and Core 2 Duo CPU
- Mac Mini 2,1
- iMac 5,1 – iMac 5,2 – iMac 6,1
- Macbook 2,1
- MacBook Pro 2,1 – MacBook Pro 2,2
- Mac Pro 1,1
- Xserve 1,1 (maybe)
There’s a pretty comprehensive guide to help determine which specific model of Mac you have here.
The Legacy BIOS / 32-Bit EFI Problem
With the hardware fully maxed out, my thoughts turned to operating systems. I’m not particularly fussy about which OS I use as the Mac Mini is just for tinkering anyway, but it did need to be as modern as possible and, as it was going to be online, security updates are essential.
Unfortunately there are some issues when dealing with one of these early Intel Macs:
- Apple’s Legacy BIOS implementation isn’t all that great and, besides, it’s generally not recommended to install an OS using this method in this day and age for reasons that I won’t go into here.
- EFI - the modern way of doing things - is supported, but it’s only 32-bit on these machines. Not such an issue if you’re installing a 32-bit OS, but if you’ve upgraded like I have (or own one of the later Core 2 Duo Macs) you’ll really want to install a 64-bit OS - particularly as 32-bit OSes are becoming increasingly unsupported.
- These machines are notoriously fussy about booting from USB, so a lot of the advice I found centred around burning DVDs. Unfortunately Apple’s “SuperDrive” isn’t all that compatible with bootable burned media either, particularly dual layer which I haven’t managed to get to work at all.
- Early Intel Macs with 32-bit EFI don’t like booting from “multi-catalog CDs”, which is the format that allows most modern OS install media to offer both Legacy BIOS and EFI support. There are however methods to modify these disk images which I will talk about in the relevant sections below.
Of course, Apple only really wanted people running Mac OS on the Intel Macs, or Windows under an officially-sanctioned Boot Camp environment. But other options certainly are possible, with varying degrees of success and their own pros and cons.
I spent an awful lot of time researching operating system options and experimenting, so I thought I’d document it here for anyone interested.
How To Boot An Intel Mac From USB And / Or DVD / CD
To boot from optical media (CD/DVD) hold down the “C” key while pressing the power button, and keep it held down until the disc starts to boot.
To boot from USB hold down the the “Option” (“Alt” on a Windows keyboard) key while pressing the power button, and keep it held down until you see the option to boot from USB pop up. You can then click on it to continue booting.
Note that some USB sticks may be recognised as an optical drive depending on how they have been written.
Mac OS
10.4 Tiger was preinstalled on the first-gen Core Duo Mac Mini 1,1 in 2006 and stopped receiving updates in 2009.
10.5 Leopard was released as an upgrade in 2007 and stopped receiving updates in 2011.
10.6 Snow Leopard is the last version of Mac OS that is officially supported on a stock Core Duo 1,1 and was released in 2009. Note that support was discontinued in 2014, but the OS will still fully auto update up to that point. Bootable DVD and USB images are available from archive.org and generally “just work”, as you might expect - write them to your USB stick using “dd” mode or, if in doubt, use Balena Etcher.
10.7 Lion can be installed if you are running a Core 2 Duo 2,1, or a Mac Mini that thinks it is one via the hacked firmware mentioned in the introduction. Lion was released in 2011 and, as above, support was discontinued in 2014, but the OS will still fully auto update up to that point. Bootable DVD and USB images are available from archive.org and generally “just work”, as you might expect - write them to your USB stick using “dd” mode or, if in doubt, use Balena Etcher.
Later Versions Up To & Including 10.11 El Capitan can be coaxed into installing on these systems using specialist tools and with varying degrees of compatibility. There is an excellent and very thorough guide available here so I won’t reinvent the wheel. Note that support for El Capitan ended in 2018, so it is also woefully out of date as far as security is concerned.
OCLP or “OpenCore Legacy Patcher” is a fantastic project that allows even later Mac OS releases (right up to the current Sonoma) to be installed on unsupported hardware. Unfortunately it doesn’t support 32-bit EFI systems such as this one, running on Mac Mini 3,1 (early 2009) and above. While outwardly identical, the 3,1 is a very different beast indeed with a 1066MHz bus speed, DDR3 RAM, the next generation of “Penryn” Core 2 Duo and onboard NVIDIA graphics.
Hacktintosh is a general concept that allows current, bang-up-to-date MacOS to be installed on commodity PC hardware, and therefore seemed a very promising avenue to explore when I initially started investigating this. Unfortunately the first-gen Intel Mac’s Intel 945gm chipset and GMA 950 integrated GPU can not be made to work at all beyond El Capitan, and so this proved to be a dead end.
Mac OS Pros
- Originality and authentic Apple experience
- Perfect compatibility
- Low hassle installation
Mac OS Cons
- No longer updated - not only is security of the OS itself a concern, but long-expired root certificates make browsing the modern internet impossible without workarounds
- Modern software support for anything older than El Capitan is basically nonexistent
Windows (Legacy) - XP / Vista / 7 / 8 / 8.1
Windows versions XP - 7 are officially supported on first gen Intel Macs by Apple’s Boot Camp. This can be run from an existing Mac OS installation, which can create install media specifically tailored to your Mac model.
Windows 8 is not officially supported, however you can upgrade from 7 with no problems. Well, if you don’t consider having to use Windows 8 to be a problem.
If installing Windows (somehow) by other means, you can also download the drivers manually under Windows (or indeed any system that can run Python) using Brigadier. This fetches the latest official Boot Camp package for your machine from Apple’s servers.
Note that there is a known issue with Boot Camp Windows installs and SATA AHCI mode, as by default Boot Camp uses SATA IDE mode to install Windows. This is particularly problematic when installing on an SSD, as it doesn’t properly support TRIM. Thankfully the fix seems relatively straightforward, although I haven’t personally tried it.
TODO: Document other installaton methods here.
Windows (Legacy) Pros
- Easy installation if using Boot Camp
Windows (Legacy) Cons
- No longer receiving security updates
- SATA AHCI mode fix required on Boot Camp installs to enable TRIM on SSDs as well as improve I/O performance
Windows (Current) - 10 / 11
It is possible to install Windows 10 and even 11 (by bypassing hardware requirement checks during install). There are 3 generally accepted methods:
- Upgrading from an officially supported Boot Camp install, for example Windows 7.
- Using modified install media to get around the early Intel Macs’ nonexistent support for multi-catalog discs.
- Removing the HDD from the Mac and starting the Windows installation in another machine.
Modified Install Media can get around the Intel Macs’ nonexistent support for multi-catalog discs. It is allegedly possible to modify them, with a successful Windows 11 example (on a Mac Pro 1,1) documented here.
Hrutkay Mods has a video about modified install media with some links to pre-modified Windows 10 images in the description, however the most recent version is 1709 (Fall Creators Update) which dates back to 2017. Support for this release ended in April 2019, but it may be possible to install it and upgrade to an up-to-date version, bearing in mind the note about 32-bit EFI listed under “cons” below.
Also note that, even with a modified image, it seems impossible to boot from a dual layer DVD using the original internal SuperDrive. It may just be that it is fussy about media.
Using Another Machine has worked for me. You will need to force install in Legacy BIOS mode if you are installing a 64-bit version of Windows due to broken/missing 32-bit EFI boot support in recent updates. I generally follow this procedure, although it’s likely that not all steps are necessary:
- Remove hard drive from Mac
- Connect the drive to a Windows machine as a secondary drive
- Delete any partitions using “Disk Management” (or diskpart) and change the type from GPT to MBR
- Download the Windows install ISO from Microsoft using their tool
- Make a bootable USB using Rufus and be sure to select the “BIOS” and “MBR” options
- Rufus will also prompt you for other options like skipping certain requirement checks, it’s probably wise to tick all of these
- Maybe temporarily disable any EFI stuff on the host machine’s BIOS
- Remove the host machine’s system / boot drive and replace it with the Mac drive
- Boot from the USB stick (in Legacy mode) and start Windows installation
- When files have finished copying and the installer reboots the system for the first time, turn it off and put the drive back into the Mac
- Hold down “Option” (“Alt” on a Windows keyboard) while pressing the power button and select the option using the mouse when it pops up
- Windows install will now complete, but you may have to repeat the above button holding ritual on every reboot (see below)
“Blessing” The Windows Partition may be required to make it bootable. If, after installing Windows using non-Boot Camp means, you find that you’re having to hold down the “Option” key (“Alt” on a Windows keyboard) every time to force the system to boot into Windows, you’ll need to “bless” the installation. For this you’ll need any compatible Mac OS installation media (Snow Leopard recommended) - you can even make an installable USB stick and boot into that as a one-off.
- Boot into Mac OS installer and choose language etc.
- Open Disk Utility to find the name of the Windows volume (mine was “Untitled” so that’s what I’ll use here)
- Close Disk Utility
- Open Terminal and type the following:
bless -mount /Volumes/Untitled -setBoot - Remove USB and switch off machine (don’t reboot or it will go back into the installer)
- Power back on - it should automatically boot into Windows, but might take a while so be patient…
Drivers can then be downloaded under Windows (or indeed any system that can run Python) using Brigadier. This fetches the latest official Boot Camp package for your machine from Apple’s servers. Note that forcing the Windows 7 drivers to install under Windows 10 and 11 can be tricky and cause problems, and that the GMA 950 graphics driver causes serious issues under Windows 11 to the point of being completely unusable.
Windows (Current) Pros
- Plenty of users report running Windows 10 with no issues, particularly the 32-bit version
- Still receiving security updates
- Supported by current Windows software
Windows (Current) Cons
- Recent updates to 64-bit versions seem to have broken booting on machines with 32-bit EFI (not just Macs) so forcing an install in Legacy BIOS mode seems to be the most reliable method
- Early Intel Mac SuperDrives don’t seem to boot from dual-layer DVDs
- Drivers can be tricky to install, forcing Windows 7 drivers on Windows 10 is generally not recommended
- I would personally highly recommend against Windows 11 due to serious problems with the graphics driver, as well as other unsupported hardware
Linux (Current)
I won’t go into too much detail about legacy versions of Linux here, but I will mention that many distros once offered a specific “amd64+mac” image which forced boot / installation in Legacy BIOS mode as a workaround for the Intel Mac’s broken support for multi-catalog media. There is some excellent information here.
To add to the confusion, older versions of Linux also often had a “Mac” build, which was for Macs with PowerPC CPUs and therefore not applicable to our Intel machines.
That said, there is a more modern effort to offer these “amd64+mac” images courtesy of Matt Gadient, who has not only released a tool to modify your own disk images but also makes pre-modded images available on his website. Note that the available distros here are a couple of years old now but still generally well supported and upgradeable to the latest versions. He also mentions in the comments that he has been experimenting with the latest Ubuntu 24.04 LTS release. I have tried his tool with this and so far been unable to get it to work.
However, there is a Linux distro that works very well on these old Intel Macs - well, minus a post-install tweak to the graphics driver to enable hardware acceleration that I’ll talk about shortly.
That distro is Debian, one of the oldest Linux distributions and still going strong today. Famed for its no-nonsense approach, stability, and excellent hardware support, I’ve found over many, many years of use that Debian “just works” where many of the newer and flashier distros fall down. So it’s no surprise that it worked just fine on this ancient Intel Mac Mini where pretty much every other option had just led to frustration and days of wasted time. It boots just fine using these old Intel Macs’ 32-bit EFI and installs a full-blown 64-bit operating system.
So, I’m recommending the following installation process to install the latest Debian (12.6 “bookworm”):
- Download the netinst (network installer) image
- Write a USB stick in “dd” mode (or use Balena Etcher) - the image is designed to fit on a CD, so pretty much any old USB stick will do
- Insert stick into Mac
- Boot by holding down the “Option” key (“Alt” on a Windows keyboard) while pressing the power button and keep holding the key down until you see the Debian installer pop up
- Proceed with the installation process as normal - as this is the net installer you will need to be connected to the internet to complete the installation - both wired and wireless worked fine on my Mac Mini 1,1 with no fiddling
- I chose the XFCE desktop as it is lightweight while still being fully featured, but I have also tested Gnome and it’s certainly very responsive and useable
If you run into an issue on first boot with the screen being blank immediately after the boot menu:
- Press
eto edit the first option in grub - Add
i915.modeset=1to the end of the/boot/vmlinuz...line (I prefer to replace the “quiet” option so I can see what’s going on). - Press F10 to continue boot
For more information on this and to make it permanent, please see this page. Of course, if hardware acceleration doesn’t bother you and Debian is booting just fine you can ignore this step, but I highly recommend it to make your install 100% perfect - I found that it increased performance by around 30%!
Linux (Current) Pros
- Older hardware is still generally very well supported
- Still receiving security updates
- Up-to-date software available
- Performance is excellent with a lightweight desktop environment like XFCE
- Sound, networking and even wifi work right out of the box (in Debian bookworm at least)
- Linux is a very powerful and flexible OS
Linux (Current) Cons
- Potential learning curve if you’re not familiar with Linux
- Graphics acceleration issue, at least in Debian
Other Options..?
TODO: Explore other options… Haiku maybe? ReactOS?
Watch this space.
If you liked this post please consider following me on Instagram or BlueSky!